The Versatility of Vertex Paint
Oct 9th 2020

For quite some time I’ve been using Vertex Paint in probably all of my work, because it’s very handy and fast way to setup masks or basic colors, specially if you do stylized stuff. The only cons that comes to my mind is that you need your topology or vertex count to match what you want to do, but I usually don’t have any issues.
I’ve made a post on Twitter to see how much people use Vertex Paint and apparently not so much people use it. So in this post I’ll show some ways that I’ve been using Vertex Paint on my work and maybe some of you will learn something new.
How to use
First let’s show how to use, because some of you may not know how to do it. When you select and object and enter in Vertex Paint mode, Blender creates a new Vertex Color channel with the name Col, that you can change to another name the represents what you are doing. You can find the Vertex Colors channels on the Object Data Properties. After enter the Vertex Paint mode you just need to paint on your model whatever you want to do, very handy isn’t?

Then to actually use it on your render, you need to add the Vertex Color channel on the Shader Editor, using the shortcut Shift+A > Input > Vertex Color.

Base Colors
The first way I wanna mention it’s for painting Base Colors, this works better if you have a more dense mesh, but it can also work with resonable low poly meshes. You can use the Blur brush to soften the colors or you can click on the Paint menu at the top of viewport and choose Smooth Vertex Colors. If you want a sharp interpolation on the colors, like I did on the eyes, you can make a selection in Edit Mode and then go back to Vertex Paint mode, click on the button Paint Mask and on the Paint menu choose Set Vertex Colors.
Masks
Another way that I use Vertex Paint is to create grayscale or RGB masks to blend or separate textures and shaders. To create a mask I usually make a selection in Edit Mode, back to Vertex Paint, enable the Paint Mask that I mentioned before and then I click on the Paint menu and choose Set Vertex Colors. And I usually use the Smooth Vertex Colors on the mask, this way I can use a ColorRamp on the Shader Editor and control there if I want a more sharpen mask or not.
Roughness
If you are a little bit lazy like me, you can even do a kind of Roughness map in just like one click. For that you need to enter in Vertex Paint mode, paint your model with a white color and then click on the Paint menu and choose Dirty Vertex Colors. In the Shader Editor you can use a ColorRamp to adjust the values and achive the Roughness result you want.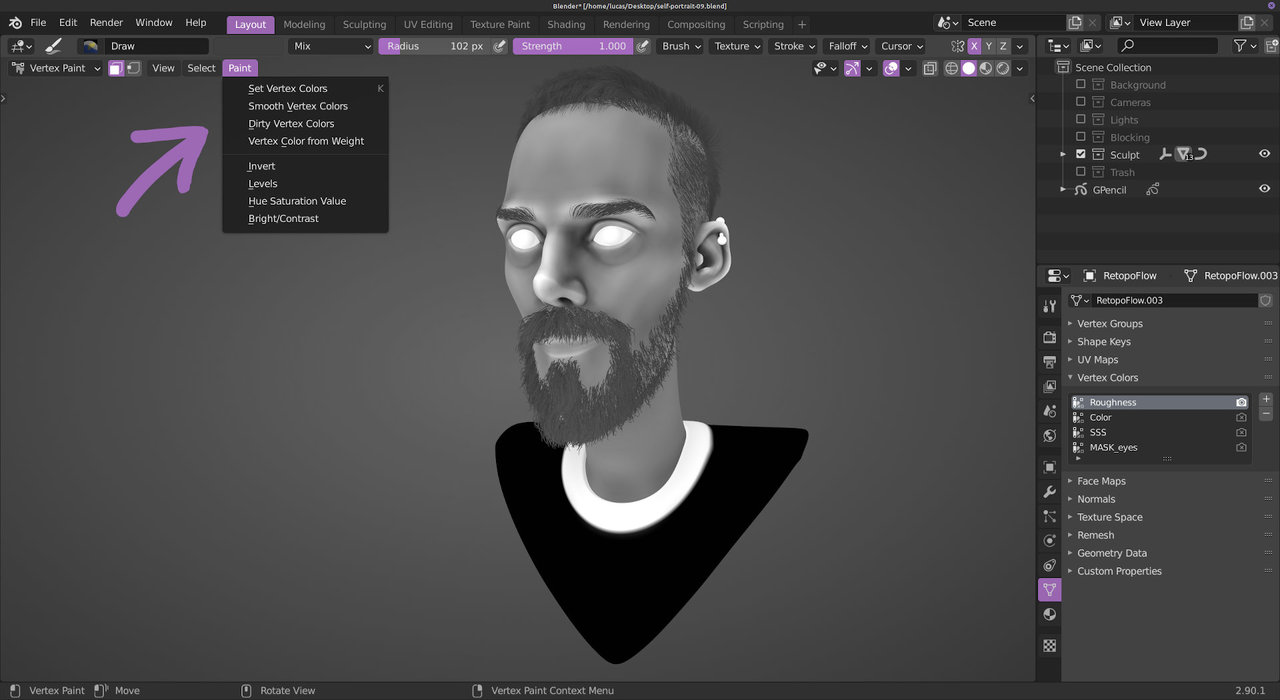
Subsurface
The last use that I wanna mention it’s to create a Subsurface Factor mask, this way you can control how much Subsurface you want for different parts, instead of choosing a single value for the entire model. I paint this mask in black and white values and then in the Shader Editor I plug it in a ColorRamp and tweak to values until I achieve the result I was looking for.
Conclusion
These are very simple tips, I’ve never seen those uses of Vertex Paint on a tutorial on the internet, so I hope it helps some of you that are reading this to improve your work quality or at least get it done faster. These tips works even better if you mixing with procedural or tile-able textures.
Anyway hope you enjoyed the tips and if you have any question feel free to leave me a message on Twitter or send me an Email.